
cPanel streamlines VPS management through an intuitive GUI, offering comprehensive tools for web hosting, email, databases, and DNS administration. While perfect for beginners with its automation capabilities and Softaculous integration, experienced users may find it restrictive due to proprietary limitations and non-standard file organization. Consider your technical expertise, customization needs, and budget – cPanel licensing adds costs but potentially saves money by consolidating multiple websites. For growing businesses, cPanel VPS offers superior control and scalability compared to reseller hosting.
Should I Host a VPS with cPanel?
While it is possible to set up a VPS Hosting platform without cPanel, some users find it helpful to have a control panel that they can access from a web browser and modify as they see fit. Using cPanel helps automate and manage a majority of system administration-related tasks, but it can also be restrictive for users looking to customize their servers in particular ways. In this article, we will discuss the pros and cons of using cPanel on VPS.
Topics Include:
cPanel on VPS
cPanel is a proprietary control panel software used for Linux-based web servers. It contains a plethora of features including web hosting, email management, database management, and DNS administration. Many providers include one or more cPanel licenses with any purchase of a VPS Hosting plan, but some charge additional fees for the license and installation of cPanel on a new server.
As mentioned previously, it is possible to find a VPS platform that does not include cPanel. These platforms generally consist of a bare-bones virtual server set up with only the most basic of services and applications. Some providers may give you a custom-built control panel solution that provides limited configuration options, others will simply provide you with the information you need to establish a remote SSH connection. If no control panel whatsoever is available, the user must perform all configuration changes via a command-line interface.
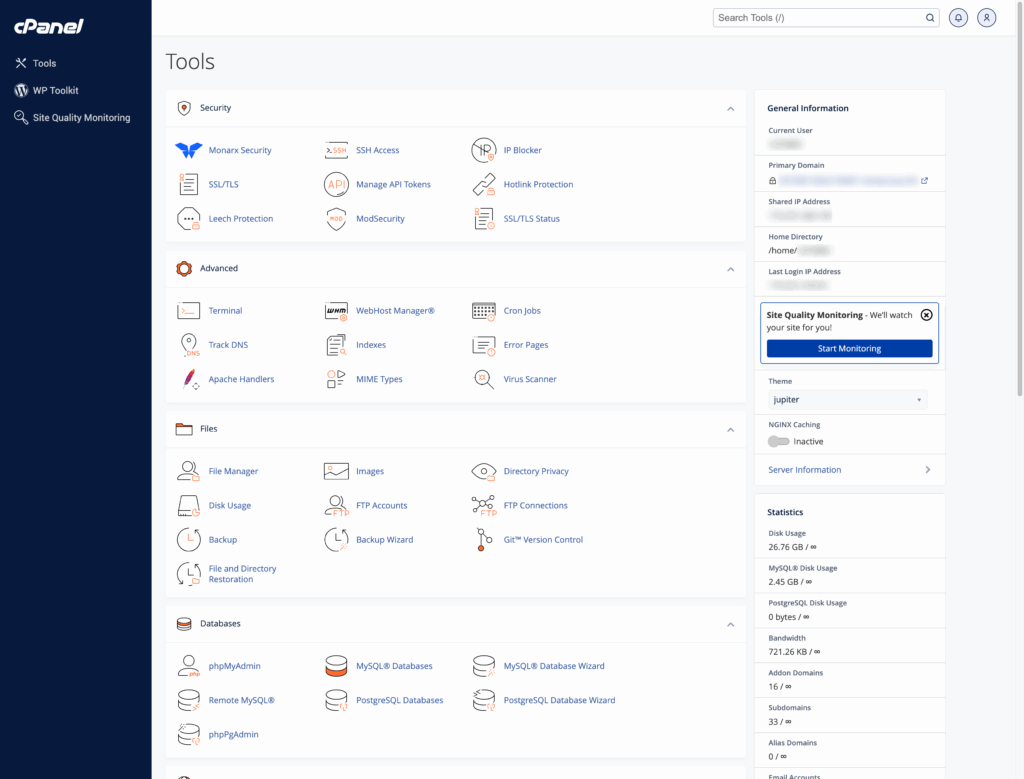
If you do choose a VPS platform with cPanel, you will be able to access many advanced configuration and system administration tools from the cPanel interface. From within cPanel, you can manage your website files, modify DNS records, access database tables, and much more. cPanel also supports plugins, pieces of add-on software that add new functionalities to your server. An example of such a plugin is Softaculous, an application installer that makes installing new software like WordPress a breeze.
Pros and Cons of cPanel VPS Hosting
Pros
GUI: The main aspect of cPanel that appeals to most users is the presence of a GUI, or graphical user interface. This GUI can be accessed via web browser from both computers and mobile devices, making it easier to use than the traditional command-line interface. This makes modifying your server and websites much more accessible and easy to understand.
DNS Management: When cPanel is installed on your server, it handles all DNS records for your various domain names in an easy-to-use GUI format. You can easily review, edit, or delete existing DNS records through the Zone Editor tool.
Database Management: cPanel also includes a robust database management system called phpMyAdmin. It allows users to create, modify, and manage MySQL databases for use in websites and other applications in an organized GUI format. This is particularly helpful for users who are not familiar with MySQL programming.
Email Management: Another feature of cPanel is webmail, a type of browser-based email client. This server-side email management tool allows users to create a certain number of email addresses associated with the domains attached to their cPanel account. Instead of relying on a 3rd party email service such as Gmail, you can use your own domain name to send and receive email. In addition, cPanel provides robust spam filters that help keep your mailbox free of junk mail and malware.
Softaculous: An add-on to cPanel, Softaculous is an easy-to-use application installer that allows users to install various applications with the click of a few buttons. WordPress, Joomla!, Drupal, and more are all available on Softaculous. You can also use Softaculous to manage your installed applications, making it easy to see at-a-glance which applications you have installed at any given time.
File Management: Through the File Manager feature, users can see their files and modify them as they see fit. They can also upload files below a certain size directly to the server using the File Manager, bypassing the need for an FTP connection. With drag-and-drop functionality, the File Manager is an ideal way for new users to easily manage their website files.
Resource Management: cPanel has built-in resource monitoring features, such as disk space usage and bandwidth consumption. These features make it easy to see if your server is struggling to provide enough resources for your websites and visitors.
WHM: Installations of cPanel on VPS platforms also feature the Web Host Manager tool. This feature allows the server owner to easily create new cPanel accounts to host additional sites, as well as modify server settings not included in the standard cPanel interface.
Potential for Cost Savings: While cPanel licensing and VPS hosting come with upfront costs, they can be significantly more affordable than maintaining multiple shared hosting accounts. If you’re hosting several websites, consolidating them onto a single VPS with cPanel can lead to notable savings over time.
Cons
Software Limitations: Having cPanel installed on your server can conflict with certain applications that have overlapping or conflicting features. Additionally, cPanel does not support all operating systems.
Time-Consuming: Some consider the use of GUI menus to be too time-consuming and would prefer to perform tasks in a command-line interface. This is generally the case for users more experienced with command-line based tasks.
Non-Standard File Organization: The file structure of cPanel differs from those of default Linux operating systems, making it potentially confusing when moving to or from a different platform.
Proprietary Software: As a proprietary piece of software, cPanel supports limited customization. This is potentially problematic for users looking to perform more advanced customizations to DNS and database management.
Cost: cPanel is not a free piece of software, and as such some users may find the cost prohibitive or would prefer to save money by handling system administration via alternate methods.
Security: By making your server control panel easily accessible via a web browser, you are making your server potentially vulnerable to brute-force hacking attempts and other intrusion methods.
cPanel Licensing Tiers and Costs
cPanel operates on a tiered licensing model based on the number of accounts you manage. As your VPS grows, your license cost can increase significantly. For example, entry-level licenses cover a small number of accounts, but if you need to host many websites, you’ll need a higher-tier license at a higher monthly fee. This scaling model can make cPanel considerably more expensive than some alternative control panels, especially for larger deployments.
While cPanel’s tiered licensing model means costs can rise as you grow, InMotion Hosting makes it easier to plan and scale with confidence. As an official cPanel partner, we offer fair, transparent license pricing with discounted rates designed to support your growth. When you choose InMotion Hosting, you’re getting more than just a VPS; you’re investing in a high-value platform that grows with you, without hidden fees or licensing surprises.
Additional Costs to Consider
Beyond the licensing fee, running a cPanel VPS often involves extra costs for essential add-ons:
Backup Solutions: Backup tools outside of the cPanel ecosystem, like Backup Manager or premium WordPress backup plugins, typically come with their own licensing fees.
Security Tools: Enhancements such as Monarx Security for server security or CloudLinux for improved stability and performance also add to the overall cost.
Server Management: If you opt for managed VPS services, there may be additional charges for custom server updates, monitoring, and support.
VPS with cPanel vs. Reseller Hosting
When deciding between VPS with cPanel and Reseller Hosting, it’s important to understand the key differences in control, resources, and scalability and how your business goals align with each option.
Key Differences: Control, Resources, and Scalability
Control: VPS (Virtual Private Server) gives you full root access, allowing deep customization of server settings, software installations, and security configurations. Reseller Hosting limits you to managing your clients within the hosting provider’s pre-configured environment.
Resources: VPS plans allocate a dedicated amount of CPU, RAM, and storage that you don’t share with others. Reseller Hosting shares resources across multiple users on the same server, which can limit performance under heavy load.
Scalability: VPS is highly scalable – you can upgrade CPU, RAM, and storage easily as your needs grow. Reseller Hosting is less flexible; major growth usually requires migrating to VPS or Dedicated Hosting.
When VPS with cPanel Makes More Sense
Growing client base: If you expect rapid client growth or clients with larger websites, a VPS provides the performance and flexibility you’ll need.
Specialized needs: For hosting applications that require custom server configurations, special software, or specific security setups, VPS is the better choice.
Brand independence: VPS hosting allows for more “white-label” opportunities, offering your clients a completely branded experience.
When Reseller Hosting Might Be Sufficient
Simpler Management: Reseller Hosting is fully managed by the provider, making it ideal if you prefer to focus on customer service rather than server maintenance.
Lower Cost: Reseller Hosting typically has a much lower entry cost than VPS hosting, making it an attractive choice for startups or those with a small client list.
No Technical Overhead: If you don’t have technical expertise (or want to avoid hiring a server administrator), reseller hosting keeps things simple.
Performance Optimization for cPanel VPS
Running cPanel on a Virtual Private Server (VPS) offers great flexibility and control. However, to ensure optimal performance, you need to fine-tune various components to match the resource constraints and workload of your VPS environment. Below are specific techniques for performance optimization for cPanel on VPS:
Optimizing Apache Settings for VPS Environments
Apache is the backbone of many cPanel-hosted websites. But its default configuration is often not ideal for a VPS with limited resources.
Here’s how to optimize Apache:
Enable Mod_Deflate: Compress content before sending it to clients to reduce bandwidth usage. In cPanel’s WHM, use the “Optimize Website” tool to enable compression for text, HTML, CSS, and JavaScript files.
Tune MaxClients and KeepAlive: Adjust the MaxClients directive to limit simultaneous connections based on your VPS’s RAM. A good starting point is (Total RAM – 200MB) / Average memory per Apache process. Enable KeepAlive to reuse connections but set a low KeepAliveTimeout (e.g., 2-3 seconds) to avoid tying up resources.
Use Multi-Processing Modules (MPM): Switch to the MPM Event module instead of the default MPM Prefork for better scalability on VPS. MPM Event handles connections more efficiently under high traffic. You can configure this in WHM under “EasyApache 4.”
Enable HTTP/2: HTTP/2 reduces latency by multiplexing requests. Enable it in EasyApache 4 to improve page load times, especially for modern websites with multiple assets.
PHP Optimization Techniques
PHP is a core part of most websites running on cPanel. Optimizing how PHP is handled can lead to huge gains:
Use PHP-FPM instead of mod_php: PHP-FPM (FastCGI Process Manager) is significantly faster and more resource-friendly than mod_php. It allows for better process control and faster request handling.
Pool settings tuning: Adjust PHP-FPM pool settings like pm.max_children, pm.start_servers, and pm.max_requests based on your VPS size to balance load and memory use.
Opcode caching: Install and enable an opcode cache like OPcache to speed up PHP execution by caching precompiled script bytecode.
MySQL/MariaDB Tuning for VPS Resources
Database performance can make or break a server, especially under load:
Optimize InnoDB Settings: Set innodb_buffer_pool_size to about 60–70% of your total RAM if MySQL/MariaDB is the primary service running on your server.
Tweak Query Cache: While MariaDB still supports Query Cache, in many cases it’s better to disable it (query_cache_type=0) to reduce overhead in modern applications.
Connection Limits: Set reasonable limits for max_connections to prevent memory exhaustion during high-traffic periods.
Caching Strategies Compatible with cPanel VPS
Effective caching can massively reduce the load on your server and speed up content delivery:
Install Server-Level Caching: Use solutions like LiteSpeed Cache (if running LiteSpeed or OpenLiteSpeed) or Varnish to cache dynamic content.
Enable Browser Caching: Set appropriate cache-control headers in your Apache or nginx configuration to reduce repeat resource loads.
Consider Object Caching: For dynamic sites like WordPress, install Redis or Memcached for object caching, and configure it through cPanel’s application manager or via plugin integration.
Ready-to-Go VPS Performance with InMotion Hosting
Manually tuning your cPanel VPS for peak performance takes time, effort, and a solid understanding of server configurations. But with InMotion Hosting, we’ve done the heavy lifting for you. Our VPS Hosting comes pre-configured with UltraStack – a custom technology stack built for speed, scalability, and efficiency. From optimized caching layers to advanced PHP handlers, UltraStack delivers a high-performance environment right out of the box, so you can focus on your website or application – not your server settings.
Get started with faster, smarter VPS Hosting from InMotion Hosting today.
Security Best Practices for cPanel VPS
Securing a cPanel VPS is critical for protecting your server from a wide range of potential threats. Here’s a comprehensive guide on security best practices for securing a cPanel installation:
1. Two-Factor Authentication Setup
Two-factor authentication (2FA) adds an extra layer of security for your cPanel login. Here’s how you can set it up:
Step 1: Log into cPanel as the root user or an administrator.
Step 2: Navigate to the Security section and click on Two-Factor Authentication.
Step 3: Enable the feature and follow the instructions to link it with an app like Google Authenticator or Authy.
Step 4: Once set up, every time you log in to cPanel, you’ll need to enter both your password and a code from the app.
2. ModSecurity Configuration
ModSecurity is a web application firewall that helps to block malicious traffic. To implement, consider the following steps:
Step 1: Log into WHM (Web Host Manager) as root.
Step 2: Under the Security Center, find ModSecurity™ Configuration.
Step 3: Enable ModSecurity and choose the appropriate security rules (e.g., OWASP Core Rule Set).
Step 4: Regularly update the rules to stay protected against new vulnerabilities.
3. Brute Force Protection Tools
Tools like ConfigServer Security & Firewall (CSF) and cPHulk are crucial for preventing brute-force attacks. Following are the steps to enable these tools:
CSF:
Install CSF from within WHM, under Plugins > ConfigServer Security & Firewall.
Configure it to block brute force login attempts by setting up login tracking and blocking IPs with excessive login attempts.
Regularly review CSF’s Security tab to view blocked IPs and ensure no legitimate traffic is accidentally blocked.
cPHulk:
Navigate to Security Center > cPHulk Brute Force Protection in WHM.
Enable protection against brute-force attacks for both cPanel and WHM.
Set thresholds for failed login attempts and configure an appropriate lockout period.
4. Regular Update Protocols
Keeping your system up to date is critical for ensuring security patches are applied promptly. Follow these protocols:
Step 1: Regularly update your system and cPanel/WHM software.
In WHM, navigate to Server Configuration > Update Preferences, and ensure updates are set to automatic or daily.
Step 2: Review your system’s software and package updates. You can run the yum update command for server-wide updates.
Step 3: Update third-party applications installed on your VPS.
Step 4: Set up a cron job to automatically check for updates.
5. Backup Automation Strategies
Regular backups are critical for data recovery in case of a breach or failure. You can enable backups by following the below-mentioned steps:
Step 1: In WHM, go to Backup and configure the Backup Configuration.
Step 2: Choose a backup schedule that works best for you (e.g., daily, weekly).
Step 3: Enable Remote Backups to ensure backups are stored off-site, ideally in multiple locations like Amazon S3, Google Drive, or a remote FTP server.
Step 4: Automate backup integrity checks to ensure data can be restored in case of an emergency.
Tip: Test your backup restores periodically to ensure you can recover quickly in the event of a server failure.
6. Account Isolation Techniques
Isolating each account is crucial for preventing one compromised account from affecting others on the server. For this, consider these steps:
Step 1: Enable SuPHP (or CloudLinux) in WHM to ensure that each user account runs under its own PHP user, preventing cross-account file access.
Step 2: Use Jailed SSH Access to restrict SSH users to their own directories, making it harder for attackers to access the entire server.
Step 3: Regularly audit and review user permissions and files on the server. Limit file permissions to the minimum necessary.
Step 4: Use CloudLinux (if available) to provide additional resource limits, improving isolation and security.
WHMCS Integration with cPanel
For VPS users who intend to host clients, integrating WHMCS (WebHost Manager Complete Solution) with cPanel is a crucial step toward automating your hosting business. WHMCS serves as a powerful billing and automation platform, streamlining everything from client signups to account management.
InMotion Hosting offers WHM pre-installed on its cPanel VPS Hosting plans.
Basic WHMCS Setup and Connection to WHM/cPanel
Setting up WHMCS with your cPanel/WHM server is straightforward. After installing WHMCS on your server, you’ll need to configure it to communicate with your WHM/cPanel environment. This involves:
Adding your server details under Setup > Products/Services > Servers within WHMCS.
Using the cPanel Module included with WHMCS to handle automated tasks like account creation, suspension, and termination.
Ensuring API access is properly set up by creating an API token in WHM/cPanel for WHMCS to authenticate securely.
This integration allows WHMCS to seamlessly manage your hosting accounts without requiring manual intervention.
Automation Possibilities for Account Creation and Billing
Beyond basic automation, WHMCS offers a wide range of advanced workflows to further enhance efficiency and customer experience. These include:
Customizable Welcome Emails: Automatically send personalized welcome messages, account details, and onboarding instructions immediately after a client signs up.
Payment Gateway Integrations: WHMCS supports a variety of payment gateways like PayPal, Stripe, and others, enabling automatic payment collection and seamless client transactions.
Recurring Billing Management: Easily handle subscription-based services with automated recurring invoices and payment processing, reducing manual bookkeeping.
Client Self-Service Portal: Clients can manage their services, view invoices, open support tickets, and order new products without direct staff involvement.
Quick Checklist: Integrating WHMCS with WHM/cPanel
To ensure a smooth and efficient setup, follow this step-by-step checklist:
Upload WHMCS to your server and complete the installation using the provided installer.
Navigate to Setup > Products/Services > Servers.
Add a new server and choose cPanel as the module.
Enter your server’s IP address, hostname, and create an API Token from WHM to securely authenticate.
Under Setup > Products/Services > Products/Services, define your hosting plans.
Link each plan to a cPanel package that exists in your WHM.
Go to Setup > Automation Settings to enable automatic account creation, suspension, termination, and invoice reminders.
Integrate payment providers like PayPal, Stripe, or other gateways to automate billing and renewals.
Create a test client and place a test order to ensure accounts are correctly provisioned and billed.
Scaling Your cPanel VPS
As your website or applications grow, ensuring your cPanel VPS can handle increased demand becomes critical. Scaling effectively means anticipating resource needs, planning upgrade pathways, considering load balancing strategies, and knowing when it’s time to migrate to more powerful hosting solutions. Here’s how to approach each aspect.
Resource Monitoring and Upgrade Pathways
Continuous resource monitoring is the cornerstone of smart scaling. Utilize cPanel’s built-in tools and additional server monitoring solutions to keep a close eye on key metrics such as CPU usage, memory consumption, disk I/O, and bandwidth. Early warning signs like consistently high CPU loads, frequent memory bottlenecks, or slow server response times signal that it’s time to take action.
Moreover, upgrade pathways should be clear and strategic. Many VPS providers offer scalable plans that allow you to increase resources like RAM, CPU cores, and storage with minimal downtime. Proactively upgrading based on monitored data – rather than reacting to performance crises – ensures a smoother experience for your users and prevents disruptions.
Load Balancing Considerations
If you manage multiple high-traffic sites or experience seasonal spikes, load balancing can be a smart way to scale horizontally instead of just vertically upgrading your server. Implementing load balancing distributes traffic across multiple VPS instances or servers, reducing the load on any single machine and improving overall redundancy.
While traditional VPS setups don’t typically include load balancing by default, many providers offer integrated solutions, or you can deploy third-party load balancers (such as HAProxy or NGINX). Load balancing ensures better uptime, faster response times, and greater flexibility as your infrastructure grows.
When to Migrate to a More Powerful VPS or Dedicated Server
There comes a point where simply upgrading your existing VPS isn’t enough. Indicators that it’s time to migrate to a Dedicated Server include:
Persistent Resource Saturation: If your VPS is constantly maxed out even after upgrades, a more robust solution is needed.
Performance Degradation: Slow site loading times, database timeouts, or frequent crashes are red flags.
Security and Compliance Needs: Some businesses outgrow shared virtualization environments due to stricter compliance requirements or heightened security concerns.
Customization Demands: A dedicated server offers full hardware control and more advanced customization capabilities, often necessary for complex applications.
Now that we’ve reviewed the pros and cons of cPanel on VPS, you can better decide if you’d prefer to have a VPS platform with cPanel or not. For newer users, cPanel may provide the ease-of-use required to help them get started. More experienced users may instead prefer to do everything via the command-line interface. Depending on your level of experience, cPanel may or may not be right for you.
When evaluating VPS with cPanel hosting providers, consider the level of management and support offered. For those with less technical experience, a fully managed VPS solution from a reliable provider like InMotion Hosting can significantly reduce the learning curve while providing the performance benefits of VPS architecture.
Upgrade to VPS Hosting for Peak Performance
Upgrade to InMotion VPS Hosting today for top-notch performance, security, and flexibility, and save up to $2,412 – a faster, stronger hosting solution is just a click away!
![]() SSD Storage
SSD Storage ![]() High-Availability
High-Availability ![]() Ironclad Security
Ironclad Security ![]() Premium Support
Premium Support
VPS Hosting