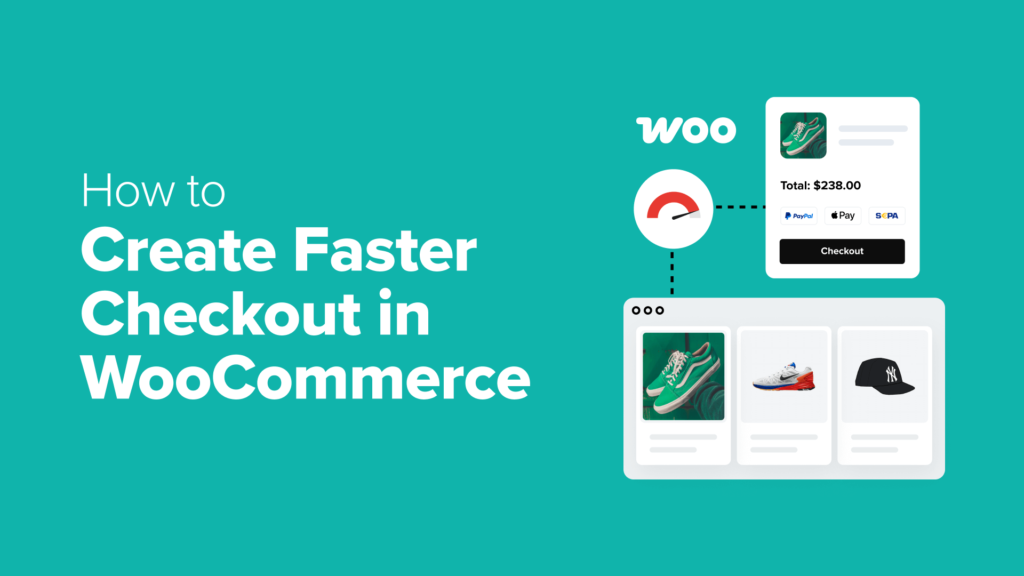
A slow or complicated checkout process can quietly hurt your WooCommerce store’s sales. I’ve seen it happen many times: a customer adds something to their cart, gets all the way to checkout… and then leaves without buying anything.
This is because even small delays or distractions during the checkout can lead to lost sales. But the good news is that it doesn’t take much effort to fix it.
I’ve helped many WooCommerce store owners make simple changes that led to faster checkouts and better results—more completed orders, higher conversions, and happier customers.
In this guide, I’ll show you easy ways to speed up your WooCommerce checkout. These are proven tips that don’t require any coding, and they can make a big difference in how smoothly your store runs.

Why Speeding Up the Checkout Process Can Boost Your Sales
No one likes a slow checkout. Just like waiting in a long line at the store can be frustrating, a clunky or confusing online checkout experience can drive customers away.
If you run a WooCommerce store, then making your checkout faster isn’t just helpful—it’s one of the easiest ways to reduce cart abandonment and boost sales.
Here’s why:
Faster checkout = happier customers: Online shoppers expect things to move quickly. When you streamline the process, it prevents your customers from feeling frustrated and looking for a competitor’s store.
Fewer steps mean fewer drop-offs: Every extra click or form field gives shoppers a chance to leave. By speeding up the process (with fewer form fields, guest checkout, or one-page checkout), you’re removing barriers to purchasing.
Mobile users love streamlined checkout: A long checkout on a small screen is tricky to use. On the other hand, a quick and mobile-friendly checkout helps smartphone users place orders without getting annoyed.
It builds trust: A slow or glitchy checkout can make people wonder if your site is secure. On the other hand, a fast and reliable experience helps build trust and confidence in your store.
No matter what you sell—products, downloads, or something else—improving your checkout process can help you earn more.
The good news? I’m going to show you a few proven tips to speed up your WooCommerce checkout and lower your cart abandonment rates.
You can use the quick links below to jump to different tips:
Tip 1: Audit Your Current WooCommerce Checkout
Before making any changes to your online store, it’s important to know how your WooCommerce checkout is looking right now. The goal is to find out if any part of the checkout is running slowly or not working as it should.
The best way to do this is by testing it yourself, just like a first-time customer would.
Begin by adding a product to your cart and completing the checkout process. Notice how many steps there are, if the layout is simple, and if there are any unnecessary fields.

I also recommend trying the process on both desktop and mobile devices. Since many customers shop on their phones, your mobile checkout experience should be just as smooth.
It’s also a good idea to test in multiple browsers (like Chrome and Safari) or ask someone else to do that and share their feedback. Sometimes, others can spot issues you might miss.
You will also want to write down any friction points you notice during the process. These could be anything from slow-loading pages to too many required form fields, confusing layouts, or a lack of mobile responsiveness.
These are the areas you’ll want to improve in the following steps to create a faster and more user-friendly checkout experience.
It’s also wise to assess the speed and performance of your checkout pages. You can use free tools like Google PageSpeed Insights to analyze load times and identify any issues that may be slowing things down.
If you don’t know how to do that, just see our article on how to properly run a website speed test.

If you find any problems, then you can follow the fixes in our ultimate guide to boosting WooCommerce speed and performance.
While manual testing helps you find obvious problems, data can show you exactly where you’re losing customers.
That is why I recommend using MonsterInsights, which is a powerful analytics plugin for WordPress with built-in eCommerce tracking. It takes complex Google Analytics data and turns it into easy-to-understand reports within your WordPress dashboard.
For details, see our beginner’s guide on how to install Google Analytics in WordPress.
With MonsterInsights’ funnel report feature, you can see how many people add items to their cart, how many reach the checkout page, and how many actually complete their purchase.

This makes it much easier to spot what’s working and what needs improvement.
You can follow our guide on eCommerce tracking to set it up on your store in just a few minutes.
Tip 2: Choose Fast WooCommerce Hosting and Plugins
Before you start optimizing your checkout page, it’s super important to look at your website’s foundation. Your web hosting and plugins can have a huge impact on how fast your entire store loads, including the checkout page.
If your web hosting is slow, then your whole store—including the checkout—will load slowly. That’s why I recommend choosing a provider that offers WooCommerce-optimized hosting.
SiteGround and Hostinger are both great choices. They are designed to keep WooCommerce stores running smoothly with features such as server-level caching, optimized databases, and excellent uptime guarantees.
We actually use SiteGround for our own website, which you can read about in our study on why WPBeginner switched to SiteGround.

Keep in mind that the right hosting will depend on your store’s size, traffic, and budget. If you want to explore more choices, check out our guide to the best WooCommerce hosting providers.
You will also want to be careful about the kinds of plugins that you install. Many online stores are slowed down by bulky or poorly coded plugins, which can seriously hurt performance at checkout.
That’s why I recommend using lightweight, reliable plugins that solve specific problems without adding extra bloat.
For example, FunnelKit helps create a faster checkout, while OptinMonster can recover abandoning visitors without slowing your site down. These plugins are well-coded, regularly updated, and built for speed.
You can find more trusted options in our full list of the best WooCommerce plugins and extensions.
Tip 3: Reduce Payment Form Fields and Checkout Steps
Every extra field in your checkout form is one more chance for a customer to get frustrated and abandon their cart. Simplifying your checkout form can have a significant impact on your store’s conversions and speed up the checkout process.
At a minimum, try to keep only the fields that are absolutely necessary to complete an order. These usually include:
Name
Email address
Shipping address (for physical products)
Payment details
If you’re currently collecting information such as company name, phone number, or order notes, consider removing it unless you genuinely need it.

Reducing the number of screens also makes a big difference in how quickly the checkout can happen. One-page checkouts keep everything on one screen so that customers don’t have to click through multiple steps.
A great tool for setting this up is Merchant. It offers a fast, mobile-optimized one-page checkout template for WooCommerce that is designed to boost conversions.

Additionally, the plugin features a visual builder that allows you to fully customize your checkout page. You can adjust the layout, add your logo, and control exactly which form fields appear, so the checkout matches your brand.
Another great option is FunnelKit Builder. This free plugin enables you to design beautiful and streamlined checkout pages with trust seals, product guarantees, customer reviews, and more.
For instructions, see our tutorial on how to customize the WooCommerce checkout page.
I also highly recommend offering express checkout to your customers. This feature lets customers skip the long form and pay with one tap using Apple Pay, Google Pay, or PayPal.

It’s one of the easiest ways to shorten the checkout process and increase conversions.
Just follow our step-by-step tutorial on how to add express checkout buttons in WooCommerce to set this up in a few minutes.
Tip 4: Offer Guest Checkout
Not everyone wants to create an account just to place a single order, and forcing them to do so can lead to cart abandonment.
When you enable guest checkout, you’re removing a major roadblock. Fewer steps mean a faster experience for new visitors who just want to complete their purchase quickly.
To enable guest checkout in WooCommerce, just go to the WooCommerce » Settings » Accounts & Privacy page in your WordPress dashboard and check the ‘Guest checkout’ box.

You can also leave the option below it checked if you want to let users create an account after purchase, but make sure it’s optional, not required.
Tip 5: Add a Slide-In Side Cart
Another small but powerful way to speed up the shopping experience is by using a slide-in side cart.
Instead of sending customers to a separate cart page, it allows visitors to view and update their carts without leaving the current page. This saves time and keeps the path to checkout short and smooth.
I recommend using the Merchant plugin for this because it comes with a built-in slide-in cart feature.
When someone adds a product, the cart slides in from the side, showing their order and giving them quick options to update quantities or remove items—without a full page reload. They can also click on the ‘Checkout’ button to navigate there right away.

This keeps shoppers focused and makes it easier for them to go straight to checkout with fewer clicks and less friction.
If you’re looking for a more customizable option, then the FunnelKit Cart plugin also offers a slide-in cart feature. You can tweak the cart to match your branding, add upselling, and set up triggers for when and where it appears.

For more details, you can follow our tutorial on how to add a sliding side cart in WooCommerce.
Tip 6: Enable One-Click Checkout
One-click checkout is exactly what it sounds like—a way for customers to complete their purchase with a single click. It’s helpful for returning customers and logged-in users who have already saved their payment information.
This works so well because it removes all the extra steps that slow people down.

The easiest way to enable one-click checkout in WooCommerce is by using FunnelKit Cart.
It’s a powerful solution for building a streamlined checkout experience, and it works great for both desktop and mobile users.
FunnelKit Cart also supports popular payment methods like Google Pay and Apple Pay, which are perfect for enabling one-click payments in your store.

To see exactly how to do that, follow our step-by-step tutorial on how to create a one-click checkout in WordPress.
Tip 7: Allow Customers to Save Credit Card Details
One way to make future purchases faster is to allow customers to save their credit card details. This means they won’t have to re-enter their payment information every time they make a purchase in your store.
It works well with popular payment gateways like Stripe or PayPal, which both offer the option to securely store customers’ credit card details for later use.
However, while saving credit card details is convenient, it’s important to do it securely. To ensure customer data stays safe, here are a few things to keep in mind:
PCI Compliance: Make sure your payment processor is PCI-DSS compliant. This is a set of rules that help protect credit card information during transactions. Stripe and PayPal both meet these standards, so you don’t have to store card information on your site yourself.
SSL Encryption: SSL is a security measure for encrypting sensitive data, including credit card details, during the transaction. You’ll want to make sure your site has an SSL certificate installed.

To allow your customers to save their payment information securely with Stripe, you can use the FunnelKit Stripe plugin.
It integrates Stripe with your WooCommerce store and offers the option for customers to securely save their payment details for faster checkout in the future.
Simply visit the WooCommerce » Settings » Payments » Stripe Gateway page and check the ‘Enable Payment via Saved Cards’ box.
Once you do that, click the ‘Save Changes’ button.

Now, when a customer chooses Stripe as their preferred payment method, their information will be securely stored in Stripe’s secure system, and the plugin will automatically handle PCI compliance.
Tip 8: Make Sure Your Checkout is Mobile-Friendly
Since so many people use their mobile devices or tablets for online shopping, you will also need to focus on providing a faster WooCommerce checkout on mobile.
The first step in creating a mobile-friendly checkout is to use a responsive WooCommerce theme. It will automatically adjust its layout based on the screen size, ensuring that customers can quickly and easily check out.
Themes like Botiga and Neve are designed to be mobile-optimized, making them great choices for your online store. For more options, you can see our list of the best WooCommerce themes.

I also recommend using large, easy-to-tap buttons and keeping your checkout layout clean and organized. This makes it much easier for customers to complete their purchases, especially on mobile devices.
If you’re using the FunnelKit Builder or Merchant to customize your checkout page, you’re already a step ahead.
These plugins are optimized for mobile by default, so your checkout form will look great and function smoothly on any screen size.

You should also be mindful of popups and other distractions that can interrupt the checkout process. These can be particularly frustrating on smaller devices.
If you’re using OptinMonster to create popups, then you’re in luck. It includes powerful display rules and conditional logic.
This means you can easily set your popups to not appear on mobile devices or during checkout, helping maintain a smooth and focused user experience.

For more tips, check out our complete guide on how to make a mobile-friendly WordPress site.
Tip 9: Test and Optimize Your WooCommerce Checkout
Once you’ve made a few changes to your WooCommerce checkout, it’s time to fine-tune everything and test whether the improvements are working.
I recommend running A/B tests to compare different versions of your checkout page, such as versions where you have changed the button text, rearranged form fields, or simplified the layout.
One easy way to do this is by using Nelio AB Testing, a beginner-friendly and free plugin that lets you create split tests right inside WordPress.
For step-by-step help, see our tutorial on how to do A/B split testing in WordPress.

To measure the results of your changes, it’s also important to track user behavior on your checkout page.
For this, I recommend using MonsterInsights, which is the same tool I mentioned in Tip 1.
It provides access to key eCommerce metrics, such as cart abandonment and conversion rates, directly from your WordPress dashboard. You can compare your data over time to see if your changes are having a real impact.
For details, you can follow my step-by-step tutorial on how to enable customer tracking in WooCommerce.
Remember, optimizing your checkout is an ongoing process. Continue testing and tracking, and you’ll see your store’s performance improve over time.
✨Bonus Tips: Quick Wins for a Lightning-Fast Checkout
Already followed the main tips in this article? Great job! Now let’s take things to the next level.
These quick wins can give your WooCommerce checkout page an extra speed boost, making things smoother for your customers and better for your bottom line.
Use a Content Delivery Network: A CDN stores your site’s static content (like images and scripts) on servers around the world. This means your checkout page loads faster for international customers. I recommend beginner-friendly CDNs like Cloudflare (we use it on all our websites, too!)
Install a Caching Plugin: Caching stores a version of your pages, allowing them to load instantly for returning visitors. Just be sure to exclude the cart and checkout pages from caching to avoid issues. Plugins like WP Rocket make it easy to do that.
Clean Up Unused Plugins: Extra plugins can bloat your site and slow down the checkout process. Take a few minutes to deactivate and delete plugins you no longer use.
Optimize Product Images: Large, uncompressed images can drag your checkout page down. Use image optimization tools like Adobe Photoshop or Optimole to compress images without losing quality.
Even small tweaks like these can make a noticeable difference in your store’s checkout speed, and that means more completed purchases and happier customers.
For even more performance tips, check out our guide on how to speed up your WordPress site.
Frequently Asked Questions About Speeding Up WooCommerce Checkout
At WPBeginner, we get a lot of questions from our readers on how to speed up their WooCommerce stores. Here are the answers to the most commonly asked questions.
How do I speed up my WooCommerce checkout page?
You can speed up your WooCommerce checkout by reducing unnecessary form fields, enabling guest checkout, and using a one-page layout. Express checkout options like Apple Pay or Google Pay also allow returning users to skip typing and complete purchases faster.
Hosting plays a big role too, so make sure you’re using a WooCommerce-optimized hosting provider and lightweight plugins that don’t slow down your site. Tools like Merchant and FunnelKit also offer built-in features like a slide-in side cart and fast-loading checkout templates.
Can I speed up WooCommerce checkout without requiring user accounts?
Yes! Enabling guest checkout is one of the easiest ways to reduce friction and speed up the process. Many users don’t want to create an account just to make a single purchase, and forcing them to do so can lead to cart abandonment.
You can enable guest checkout in your WooCommerce settings in just a couple of clicks.
How do I know if my WooCommerce checkout is too slow?
Start by testing your own checkout on both desktop and mobile, paying attention to the number of steps required and how quickly the page loads. You can also use tools like Google PageSpeed Insights to test performance.
For deeper insights, we recommend using MonsterInsights to track cart abandonment and see exactly where customers are dropping off in the process. This data helps you spot issues that may not be obvious just by clicking through the site yourself.
I hope this article helped you learn how to create a faster checkout in WooCommerce. You may also want to see our tutorial on how to offer shipment tracking in WooCommerce and our guide on WooCommerce SEO made easy.
If you liked this article, then please subscribe to our YouTube Channel for WordPress video tutorials. You can also find us on Twitter and Facebook.