Transitioning from shared hosting to a Virtual Private Server (VPS) provides improved performance, enhanced security, and greater control over your website environment. While setting up a VPS requires more technical knowledge than shared hosting, this comprehensive guide walks you through the entire process, from selecting a hosting provider and operating system to optimizing performance.
Once your website outgrows the shared hosting plan, it’s time to move to VPS (Virtual Private Server) hosting. This way, your site receives automatic updates, enhanced security, and faster page load times.
In fact, VPS servers are growing quickly in popularity. But it’s not so easy to set up a VPS (Virtual Private Server), at least for someone who’s not a techie. You’ll need to install the operating system, secure the website, and configure software that was once handled for you.
But worry not – you can have your VPS running nicely with the proper guidance.
In this guide, we’ll show you how to set up your VPS server right from the start.
What You Need Before Setting Up Your VPS Server
Before installing a Virtual Private Server (VPS), here are some important prerequisites to fulfill before you facilitate a smooth and secure setup:
Choose a VPS Hosting Provider
There are lots of decent hosting providers out there. We recommend you choose one that’s worth the money you’ll invest. Some well-known providers are:
DigitalOcean
InMotion Hosting
Vultr
Amazon Web Services (AWS)
GoogleCloud
Select an Operating System
With most VPS providers, you have a choice among various Linux distributions, such as Ubuntu, Debian, or AlmaLinux. You should decide based on your familiarity with Linux distributions and the web software you intend to use.
Linux distributions are known for their stability, security, and flexibility. Each distribution has its strengths:
Ubuntu: It’s user-friendly, frequently updated, and widely supported.
Debian: A great choice if you prioritize reliability over cutting-edge updates.
AlmaLinux (or Rocky Linux as a replacement): Preferred for enterprise environments due to its long-term support and compatibility with cPanel.
Credentials & Access Information
Make sure you have this information before you begin:
VPS Login Credentials: IP address, username, and password or SSH key, which are provided by your hosting provider.
Domain Registrar Login: If you’re setting up a website, you’ll need to log in to your domain name provider to set DNS settings.
Database Credentials: If you use a database such as MySQL or PostgreSQL, you should have admin access.
Root or sudo Access: To install and configure software on your VPS, you need to have admin privileges.
Determine Your Resource Requirements
Figure out how much CPU, RAM, storage, and bandwidth you need. For example, if you’re hosting a website, operating applications, or processing databases, make sure your VPS can handle the traffic and processing requirements.
Obtain an SSH Client (For Linux VPS)
If you’re using a Linux-based VPS, you’ll need an SSH client to connect remotely. Some common SSH clients are:
Windows: PuTTY, OpenSSH (comes bundled with newer versions of Windows)
macOS/Linux: Terminal (includes SSH)
Accessing Your VPS for the First Time
Have you gathered the credentials we mentioned in the prerequisites? Now it’s time to access your VPS remotely. This is typically done using Secure Shell (SSH) for Linux-based servers.
Below are the steps to connect to your VPS for the first time.
Step 1: Connect via SSH (for Linux-based VPS users)
Open your SSH client (e.g., Terminal or PuTTY).
Enter the following command (replace your_ip with your VPS IP address):
If prompted, type yes to accept the connection.
Enter the root password when prompted.
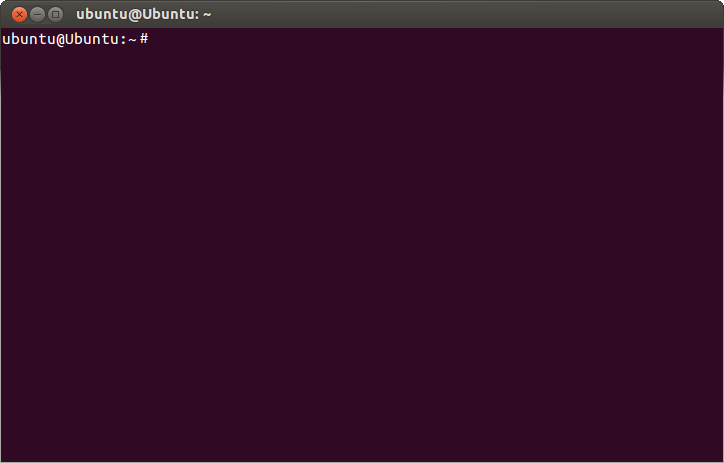
Once logged in, you should see the command-line interface of your VPS.
Step 2: Change the Default Password
It’s highly recommended to change the default password immediately after logging in. In your Linux terminal, type”passwd” and follow the on-screen instructions to set a new, strong password.
Step 3: Update System Packages
Keeping your system up to date ensures that you have the latest security patches and software improvements.
For Linux VPS (Debian/Ubuntu): Execute the following command:
apt update && apt upgrade -y
For Linux VPS (AlmaLinux/RHEL): Input the below command:
If you’re new to VPS hosting, InMotion Hosting makes the setup process easy. Our VPS plans come with detailed connection instructions and expert support to help you get started without any hassles!
Essential First Steps for VPS Configuration
Once you deploy a VPS, it’s time to configure it. Here are the essential first steps to follow if you are using Linux:
1. Create a New User and Grant Permissions
By default, VPS instances often come with a root user. Since root gives unrestricted access to the system, using it directly can be risky.
Instead, create a new user with limited privileges. Here’s how:
In SSH client, input these commands:
adduser newuser
usermod -aG sudo newuser
Replace new user with your desired username.
2. Set Up SSH Key Authentication
SSH key authentication is more secure than password-based logins, as it uses cryptographic keys to verify your identity. To set this up on a Linux-based VPS, run the following commands:
ssh-keygen -t rsa -b 4096 (generate an SSH key pair on your local machine)
ssh-copy-id newuser@your-server-ip (copy the public key to the server)
sudo nano /etc/ssh/sshd_config (opens the configuration file)
In the nano text editor, locate the line for ‘PasswordAuthentication’ and change it to ‘no’:PasswordAuthentication no
To save the file in nano:
Press CTRL+O to write the changes
Press Enter to confirm
Press CTRL+X to exit the editor
Restart SSH service:
sudo systemctl restart ssh
Note: Make sure you’ve saved the file before restarting.
3. Configure the Firewall
A firewall helps restrict unauthorized access to your server. Configuration depends on your Linux distribution:
For Ubuntu/Debian (UFW):
sudo apt install ufw -y
sudo ufw allow OpenSSH
sudo ufw allow 80/tcp
sudo ufw allow 443/tcp
sudo ufw enable
For AlmaLinux/RHEL (firewalld):
sudo yum install firewalld -y
sudo systemctl start firewalld
sudo systemctl enable firewalld
sudo firewall-cmd –permanent –add-service=ssh
sudo firewall-cmd –permanent –add-service=http
sudo firewall-cmd –permanent –add-service=https
sudo firewall-cmd –reload
4. Set Up Fail2Ban
Fail2Ban helps prevent brute-force attacks by blocking repeated login failures. To implement, run these commands:
sudo apt install fail2ban -y (for installing fail2ban on Debian/Ubuntu
sudo yum install fail2ban -y (for installing fail2ban on AlmaLinux/RHEL)
sudo systemctl enable fail2ban (enables the fail2ban service)
sudo systemctl start fail2ban (start the fail2ban service)
sudo nano /etc/fail2ban/jail.local (configure Fail2Ban rules)
To help you, here are example settings for Fail2ban:
[sshd]
enabled = true
maxretry = 5
findtime = 600
bantime = 3600
sudo systemctl restart fail2ban (save and restart Fail2Ban)
5. Configure Automatic Security Updates
Keeping your system updated is crucial for security. Enable automatic updates:
For Debian/Ubuntu systems:
sudo apt install unattended-upgrades -y
sudo dpkg-reconfigure unattended-upgrades
For AlmaLinux/RHEL systems:
sudo yum install dnf-automatic -y
sudo systemctl enable dnf-automatic.timer
sudo systemctl start dnf-automatic.timer
Installing Your Web Server Environment
Setting up a web server environment on a Virtual Private Server (VPS) is essential for hosting websites and applications. The process for Linux-based VPS is as follows:
Choose a web server like Apache or Nginx.
In the SSL, run the following commands to install and enable the web server (we’ve mentioned example commands for Apache servers):
sudo apt install apache2 -y (for Ubuntu/Debian)
sudo yum install httpd -y (for AlmaLinux )
sudo systemctl start apache2 && sudo systemctl enable apache2 (for Ubuntu/Debian)
sudo systemctl start httpd && sudo systemctl enable httpd (for AlmaLinux)
If you’re hosting a dynamic site, install PHP and a database like MySQL or MariaDB by following the commands (optional):
sudo apt install php php-mysql mariadb-server -y (for Ubuntu/Debian)
sudo yum install php php-mysql mariadb-server -y (for AlmaLinux)
sudo systemctl start mariadb && sudo systemctl enable mariadb
sudo mysql_secure_installation
Adjust firewall settings: Allow web traffic by executing these commands:
sudo ufw allow ‘Apache Full’ (for Apache)
sudo ufw allow ‘Nginx Full’ (for Nginx)
For verification, open your web browser and enter your VPS IP address (e.g., http://your-server-ip). You should see the default Apache or Nginx welcome page.
Connecting Your Domain to Your VPS

To make sure your website is accessible worldwide, it’s essential to connect a domain to your VPS. For this, consider these steps:
Log in to your VPS using SSH or your hosting provider’s dashboard.
Run the command “ip a” or check your provider’s interface to find your server’s public IP address.
Log in to your domain registrar’s control panel (e.g., Namecheap, GoDaddy, or Cloudflare).
Locate the DNS Management section.
Add or modify the following records:
A record: Points your domain (e.g., example.com) to your VPS’s IP address.
CNAME record (optional): Redirects www.example.com to example.com.
DNS changes may take a few minutes to 48 hours to propagate worldwide. You can use tools like dnschecker.org to verify if the new records are active.
Migrating from Shared Hosting to Your VPS
Migrating from shared hosting to VPS is a big step. To prevent data loss and downtime, follow this migration checklist:
1. Backup Your Website Data
Before making any changes, create a full backup of your website files, databases, and configurations. Most hosting providers offer backup tools within the control panel, but you can also use manual methods such as:
cPanel backup: Generate a full website backup from cPanel.
FTP/SFTP download: Manually download all files using an FTP client like FileZilla.
Database export: Use phpMyAdmin or MySQL commands to export your database.
Third-party backup services: Consider using cloud-based backup solutions for added security.
Store these backups securely on your local machine or cloud storage before proceeding.
2. Transfer Files to Your VPS
Once you have a backup, transfer your website files to the VPS. You can use several methods:
SCP or Rsync: For faster and more secure file transfers over SSH.
FTP/SFTP: Upload files using an FTP client like FileZilla or Cyberduck.
Control panel migration tools: Some VPS providers offer automated migration tools to streamline the process.
Ensure all files, including images, scripts, and configuration files, are properly copied to their respective directories on your VPS.
3. Import Databases
With the files transferred, you now need to restore your database:
Via phpMyAdmin: If your VPS has phpMyAdmin, use the import feature to upload your database.
Using MySQL command line: Access your VPS via SSH and run the following command:
mysql -u your_username -p your_database_name < backup.sql
After importing, update your website’s configuration files (e.g., wp-config.php for WordPress or .env files for Laravel) with the new database credentials.
4. Verify the Migration
Before updating DNS settings, verify that your website is fully functional on the VPS:
Check file permissions: Ensure proper ownership and permissions to avoid errors.
Test database connectivity: Confirm that your website can connect to the new database.
Preview using the hosts file: Modify your local hosts file to test the site without changing DNS.
Monitor for errors: Enable logging to detect any issues and fix broken links or missing files.
Hosting Multiple Websites on Your VPS
Hosting multiple websites on your VPS? In that scenario, you can allocate resources efficiently and ensure security through proper isolation. Below are key considerations for managing multiple sites effectively:
1. Resource Allocation for Each Website
Distribute your VPS resources, such as CPU, RAM, storage, and bandwidth, efficiently across websites. It makes sure each site runs smoothly without affecting others.
Limit resource usage: Tools like cgroups (Control Groups) in Linux or CloudLinux OS can restrict CPU and RAM usage per website to prevent resource hogging.
Optimize database performance: If multiple websites rely on databases, use separate databases or tables and optimize queries to prevent overload.
Utilize a reverse proxy: A reverse proxy, such as Nginx, can distribute traffic efficiently and cache content to reduce server load.
Monitor usage: Install monitoring tools like Netdata, Prometheus, or New Relic to track server performance and make necessary adjustments.
2. Website Isolation for Security
Isolating websites prevents security vulnerabilities from spreading across sites. Key measures include:
Separate user accounts: Assign different system users for each website to limit access rights.
Chroot or containers: Use chroot environments or lightweight containerization tools like Docker to keep websites in isolated environments.
Firewall and access controls: Configure iptables, UFW, or security groups to restrict access to sensitive services.
SSL/TLS encryption: Use Let’s Encrypt or other SSL certificates to secure connections for each website individually.
Web application firewall (WAF): Deploy a WAF like ModSecurity to filter malicious traffic and prevent attacks.
Securing Your VPS Against Common Threats
When setting up a VPS, security should be a top priority. Follow these security measures to protect your server from cyber threats, unauthorized access, and malware infections:
Antivirus & anti-malware software: Install tools like ClamAV, Maldet (Linux Malware Detect), or rkhunter to scan for and remove malware infections. These tools can detect malicious scripts, backdoors, and rootkits.
Integrity monitoring: Tools like Tripwire or Aide monitor your file system and alert you in case of unauthorized changes or potential security breaches.
DDoS protection: Distributed denial-of-service (DDoS) attacks can overwhelm your server with excessive traffic. Using services like Cloudflare, DDoS-protected VPS providers, or tools like IPTables can help mitigate these attacks.
Optimizing Your VPS for Maximum Performance
Want fast response times, efficient resource utilization, and a seamless user experience? If so, consider three key strategies to maximize your VPS’s performance:
1. Set Up a CDN
A Content Delivery Network (CDN) distributes your website’s static content, such as images, CSS, and JavaScript files, across multiple servers worldwide. This reduces latency by serving content from the server closest to the user, thereby improving page load times and reducing the strain on your VPS. Popular CDN providers include Cloudflare, Amazon CloudFront, and Fastly.
2. Optimize Server Resources
Efficient resource allocation is crucial for maintaining VPS performance. Regularly monitor CPU, RAM, and disk usage to identify bottlenecks and optimize processes. Consider the following best practices:
Use a lightweight web server like Nginx or LiteSpeed instead of Apache for better efficiency.
Enable Gzip compression to reduce file sizes and speed up data transfer.
Remove unnecessary services running in the background to free up resources.
Upgrade to SSD storage if your VPS supports it, as SSDs significantly improve read/write speeds.
3. Enable Caching
Caching helps reduce server load and improves performance by storing frequently accessed data in memory. Implement the following caching techniques:
Browser caching: Configure HTTP headers to store static files locally on users’ devices.
OPcode caching: Use PHP caching solutions like OPcache to optimize script execution.
Managing VPS Costs Effectively
Setting up a virtual private server is costly, for sure. Thankfully, with careful management, you can optimize expenses without compromising performance:
Choose the right plan: Avoid overpaying for resources you don’t need. Start with a basic VPS plan and scale up as necessary. Many providers offer flexible plans, which means you can upgrade storage, RAM, or CPU as your needs grow.
Use cloud billing alerts: Most VPS providers have monitoring tools that let you set budget alerts. Configuring these alerts can help you track usage and avoid unexpected charges.
Utilize auto-scaling: Some cloud-based VPS providers offer auto-scaling, where you pay only for what you use. If your server traffic fluctuates, this plan can be more cost-effective than a fixed subscription.
Take advantage of discounts and long-term plans: Many providers offer discounts for annual or long-term commitments. If you plan to use the VPS long-term, a yearly subscription can save money compared to monthly billing.
Understanding Compliance Requirements for Your VPS
When setting up a Virtual Private Server (VPS), it is crucial to understand and adhere to relevant compliance requirements. Key aspects to consider include:
1. General Data Protection Regulation (GDPR)
If your VPS processes personal data of individuals in the European Union (EU), compliance with GDPR is mandatory. GDPR enforces strict rules on data privacy, security, and user rights. Some key requirements include:
Data encryption: Ensuring that personal data is stored and transmitted securely.
Access control: Implementing strong authentication and authorization mechanisms.
Data processing agreements: If using third-party services, ensure they comply with GDPR as well.
Right to access & deletion: Users need to have control over their data, including the ability to request deletion.
Failure to comply with GDPR can result in severe fines and legal consequences.
2. Payment Card Industry Data Security Standard (PCI DSS)
If your VPS is used for handling payment card transactions, you must comply with PCI DSS to ensure the security of cardholder data. Key requirements include:
Firewall protection: Implementing firewalls to safeguard data against unauthorized access.
Secure transmission: Using SSL/TLS encryption for data sent over networks.
Security audits: Conduct vulnerability assessments regularly.
Access restrictions: Granting access to payment data only on a need-to-know basis.
Learn more about How to Pass PCI Complaince Scans.
Monitoring Your VPS Health and Performance

After setting up your VPS server, implementing a robust monitoring system is essential to ensure optimal performance and prevent potential issues before they impact your services. Here’s how to do it:
1. Key Metrics to Monitor
CPU Usage: High CPU usage over prolonged periods may indicate overloaded processes or inefficient applications.
Memory (RAM) Usage: Keeping an eye on RAM usage helps prevent crashes caused by insufficient memory.
Disk Usage: Ensure your storage does not reach its limit, as a full disk can slow down performance and cause system failures.
Network Traffic: Monitoring bandwidth usage helps detect unusual spikes that may indicate security threats or misconfigured applications.
Process and Service Status: Regularly check running processes and critical services to ensure they are operating smoothly.
2. Tools for VPS Monitoring
There are several command-line utilities available to monitor VPS performance:
htop: Lets you visualize system resource usage in real time.
top: Display active processes and system resource consumption.
vmstat: Provides detailed reports on CPU, memory, and disk usage.
iostat: Helps monitor disk activity and performance.
For a more comprehensive approach, consider using monitoring software such as:
Nagios
Zabbix
Prometheus & Grafana
3. Setting Up Automated Alerts
To proactively address issues, configure alerts based on predefined thresholds. Many monitoring tools allow you to receive notifications via email, SMS, or webhooks when performance metrics exceed normal levels. For example, you can set alerts for:
High CPU or memory usage beyond 90%
Disk space reaching 80% capacity
Network activity anomalies indicating potential DDoS attacks
Critical services (e.g., web server, database) failing or stopping unexpectedly
4. Log Monitoring and Security Checks
Regularly review system logs to detect errors, warnings, and potential security breaches. Useful log files include:
/var/log/syslog & /var/log/messages – General system logs
/var/log/auth.log – Authentication attempts and security logs
/var/log/nginx/access.log & /var/log/nginx/error.log – Web server logs (if using Nginx)
/var/log/mysql/error.log – Database-related logs (if using MySQL)
Consider using log monitoring tools such as Logwatch or GoAccess to analyze logs efficiently.
Resolving Common VPS Setup Problems
Setting up a VPS (Virtual Private Server) can be challenging, especially for beginners. Below are some common issues you might encounter during the setup process and how to resolve them effectively:
1. Connection Issues
Problem: Unable to connect to the VPS via SSH.
Solutions:
Ensure the VPS is running and your IP address is correct.
Check firewall settings and allow SSH access:
For systems using UFW (like Ubuntu/Debian):
sudo ufw allow 22/tcp
sudo systemctl restart ssh
For AlmaLinux or systems using firewalld:
sudo firewall-cmd –permanent –add-port=22/tcp
sudo firewall-cmd –reload
sudo systemctl restart sshd
If using a custom SSH port, make sure to allow it through the firewall:
For UFW:
ssh -p [custom_port] user@your_vps_ip
For Firewalld:
sudo firewall-cmd –permanent –add-port=[custom_port]/tcp
sudo firewall-cmd –reload
Restart the SSH
2. Incorrect Permissions or Authentication Failures
Problem: Permission denied when trying to log in.
Solutions:
Verify that your SSH key is correctly added to ~/.ssh/authorized_keys.
Set proper file permissions:
chmod 600 ~/.ssh/authorized_keys
chmod 700 ~/.ssh
If using a password, ensure that password authentication is enabled in /etc/ssh/sshd_config:
PasswordAuthentication yes
Restart SSH after making changes
3. Insufficient Resources (CPU, RAM, Disk Space)
Problem: The VPS is slow or unresponsive.
Solution:
Upgrade your VPS plan if resources are consistently maxed out.
Optimize applications and services to reduce resource consumption (e.g., enable caching, reduce background processes).
To have reliable support in case of any VPS setup issues, consider InMotion Hosting. Our U.S.-based support team is available 24/7 for professional guidance and troubleshooting.
Taking Your VPS to the Next Level
Once you’ve established a basic VPS setup, scaling and implementing advanced features can significantly enhance your server’s performance, reliability, and capabilities. Here’s how to take your VPS to the next level:
1. Scaling Your VPS
As your website or application grows, your VPS may require more resources to handle increased traffic and processing demands. Try out the following scaling strategies:
Vertical scaling: Upgrade your VPS by increasing CPU, RAM, or storage through your hosting provider. This is the simplest way to boost performance without changing your architecture.
Horizontal scaling: If vertical scaling isn’t enough, consider horizontal scaling. It involves distributing traffic across multiple VPS instances using a load balancer.
2. Advanced Implementations
To take full advantage of your VPS, implement advanced configurations and optimizations:
Reverse proxy with Nginx or Apache: Improve load distribution and security by using a reverse proxy.
Containerization with Docker: Deploy applications in isolated containers for better resource management, security, and scalability.
Kubernetes for orchestration: If running multiple containers, Kubernetes automates deployment, scaling, and management across multiple VPS instances.
Need help with Advanced Server Functions? Try our Professional Website Support Services for expert server setup, custom solutions, and expert advice.
Frequently Asked Questions
What are the essential security measures to take after setting up a VPS?
After setting up a VPS, it is crucial to enhance security by updating the system using sudo apt update && sudo apt upgrade (for Debian-based systems) or sudo yum update (for RHEL-based systems). You should also change the default SSH port, disable root login, configure a firewall using UFW or iptables, and install Fail2Ban to prevent brute-force attacks.
What is the best VPS hosting service?
We may be biased, but the facts don’t lie. InMotion Hosting offers top-tier VPS services with high-speed SSD storage, full root access, and 24/7 support. When you also include our managed and unmanaged plans, it’s an ideal service for businesses and developers needing reliability and scalability.
Final Thoughts
Setting up a VPS server is a complex yet rewarding process. By following the steps outlined in this guide, you can create a powerful, flexible hosting environment tailored to your specific needs.
For those looking for a reliable VPS hosting solution, InMotion Hosting stands out. Our VPS plans offer excellent resource allocation, high-availability infrastructure, and user-friendly management tools that make the entire setup process significantly easier.
Upgrade to VPS Hosting for Peak Performance
Upgrade to InMotion VPS Hosting today for top-notch performance, security, and flexibility, and save up to $2,412 – a faster, stronger hosting solution is just a click away!
![]() SSD Storage
SSD Storage ![]() High-Availability
High-Availability ![]() Ironclad Security
Ironclad Security ![]() Premium Support
Premium Support
VPS Hosting